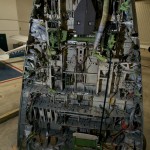
The march towards the cutting process continues: almost down to bare metal!
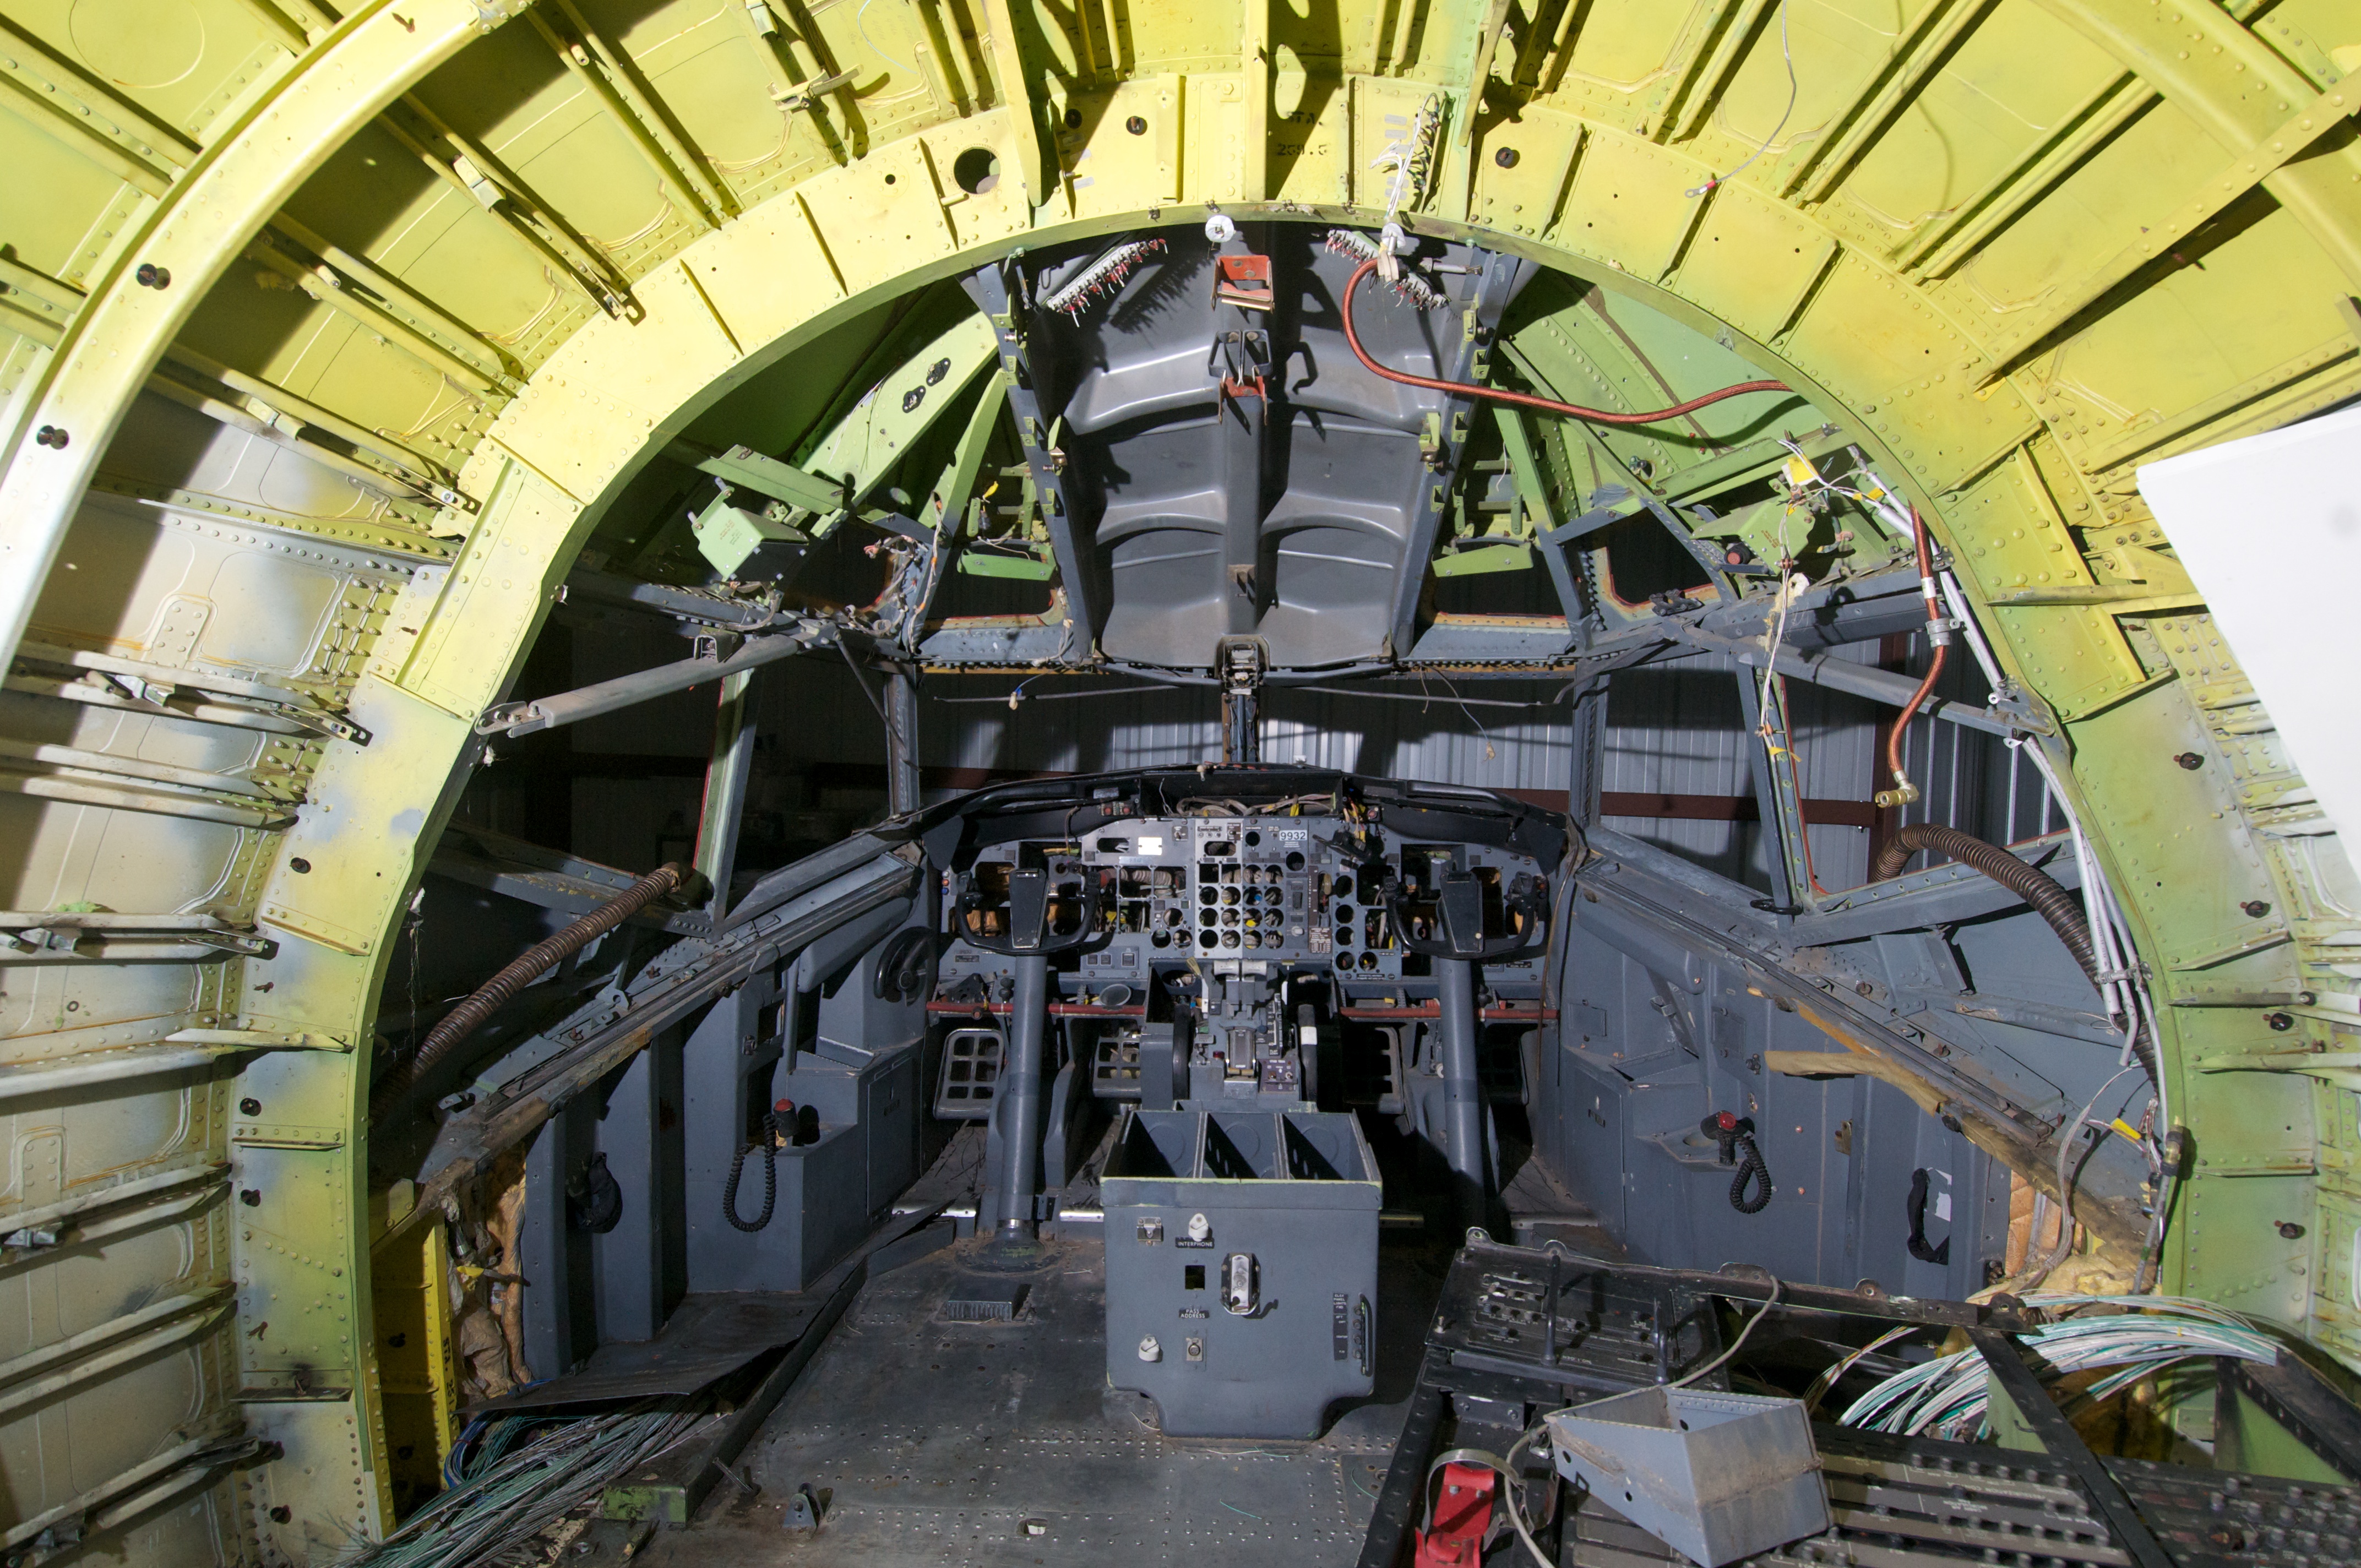
As predicted, the circuit breaker panel on the captain’s side was somewhat easier to remove. I continue to be slowed by tenacious stuck fasteners, some covered with a thick layer of paint courtesy of some past United Airlines refurbishment project. Today after breaking not one but two damaged fastener remover bits, I decided to direct my efforts at something less frustrating: cleaning out the overhead area. The pictures show the results. Hopefully another two days will have the inside metal surface of the airframe completely exposed and ready for cutting into sections.
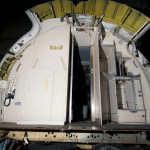
These plastic trim panels below the side windows are secured with several screws, usually very difficult to remove.The overhead area after removing the forward and aft Dzus frames. The remaining grey plastic is a tray that is held in place by the support rails on either side. This piece will have to come out in order to find places to cut the structure. Another mystery waiting to be solved.Large beefy beam defines the aft limit of the flight deck. I plan divide this arch into three sections during the cutting process.
In late October my wife and I finally moved into our dream house: a place big enough for our menagerie of two dogs and two cats, with ample room left over for theultimate man cave: a full size, fixed-base Boeing 737 simulator in the basement! Unfortunately all the tasks associated with moving brought progress on the sim to a grinding halt for close to six months.
The avionics test bed in my basement. Looks pretty spare right now, but in a few weeks this will be all lit up by a network of five computers to start testing avionics.
I did manage to bring home most of the gear I had acquired prior to taking the major leap of buying an entire nose section. I set this up in the basement with the idea of making an avionics test bed for the additional real Boeing parts that I continue to find on eBay and other internet sources. The dual-linked flight controls, throttle quadrant and projection screen were made by Art May-Alyea of Northern Flight Sim. I had a steel frame made at my local metal fabricator that allowed me to hang the overhead panel in the proper position on the ceiling. It’s not flying yet, but I will need to get it running soon, as I just acquired a real fire control panel and other real parts that need to be interfaced.
The lav, left, and the galley, right, flank the cockpit door.
The nose section of N332UA still sits out at the airport, where I continue to remove parts from the interior in anticipation of cutting it into sections small enough to fit through the standard residential door of my walkout basement. The galley was easy enough to remove, as it is essentially a single assembly bolted to the floor, and attached to the top of the airframe by only one large pin. Removing the plumbing and electrical connections was relatively easy, especially compared to removing the lav on the captain’s side. The walls of the lav were bolted to the floor some 24 years ago, and almost every fastener was stuck enough that removal required drilling. A side benefit was that I finally figured out how to use those damaged screw removal kits they sell at Sears.
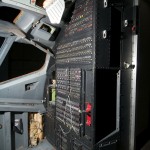
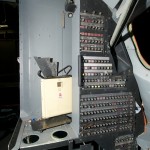
The galley, liberated. A lot of really mediocre coffee and food passed through these cubicles, some of it still stuck to the insides.After removing the galley, the F/O side circuit breaker module comes into view.Extraction of the F/O side circuit breaker module required removing a section of the composite floor below the galley. The assembly was attached to the airframe in at least 15 different places, only a few of which are seen here along the bottom of the zinc chromated (green) wall. Believe me, no one ever intended these things to be removable.
The disassembly phase continued to the wall of circuit breakers behind the first officer’s seat. For better or for worse, I had seen a really cool video online showing how the interior of the 737 is installed, and it was very clear (see it at 0:25 into the video) that the structure housing the circuit breakers was an assembly that rolled in and bolted to the airframe. While it was probably made to be easy to install, it was never intended to be removed and it took a couple of days of removing wire bundles, ducting and insulation before I found all of the fasteners holding it in place. There was also quite a bit of head-scratching and occasionally swearing. Several times I was certain I had found all the screws and bolts but a vigorous shaking only revealed that it was still attached somewhere. It finally came loose and fell backwards onto the floor, with a very satisfying thud and a genuine feeling of progress.
The circuit breakers behind the F/O's seat, early on in the removal process.The circuit breaker assembly on the F/O side, finally liberated from its many attachments to the airframe and free to fall on its back.
The wall behind the captain’s seat consists of a much smaller circuit breaker assembly, as well as a wall and a jumpseat. If anyone ever had the idea of burrowing through the front of the first class lav to break into the cockpit in flight, let me just say that it’s never going to happen!
Captain's side circuit breaker panels and jump seat.
Now that I’m basically up to the rear of the crew seat area, the next step is to remove the rest of the interior so I can start cutting the structure into sections. To that end, I’ve had some paired brackets made that I will rivet into place on either side of the section lines. The hole in the receiving bracket is elongated, to allow for some play during the reassembly process. With continued good weather, I should be cutting sections within the next two weeks.
Pair of brackets ready for installation on the airframe.
I’ve been making quite a bit of progress on another front: making a working 737 simulator for my friend Radcliffe, a WWII veteran of the Army Air Corps who learned to fly in Stearmans and T-6’s. Before he saw combat, the war ended and his flying dream ended along with it. After discharge from the military he found himself with no money and no opportunity to keep flying, so he went to work for the US Government Printing Office. In retirement he has rekindled his dream by building increasingly complex 737 simulators. Currently he has one large one in his garage and a smaller one in what used to the living room of his house. Working on this sim has been a pleasure as Radcliffe has invested in some really nice avionics from Flight Deck Solutions, Northern Flight Sim and CP Flight. This week we managed to take off and fly for a couple of hours on the autopilot, with a fully functional overhead.
Radcliffe during flight training in 1945
Radcliffe in his latest sim, formerly the living room of his houseRadcliffe's sim, complete with overhead panels from Flight Deck Solutions
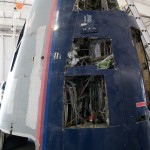
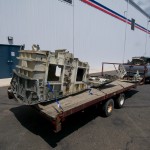
Luckily the center of gravity after cutting favored this nose up attitude, which facilitated landing on the trailer about an hour later.
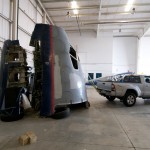
The past month has been a busy one for N332UA. After it became apparent that the cockpit would not fit into the originally planned indoor destination, we had to divert to a nearby corporate hangar, which was generously offered by Pat Colgan, the owner of Capital Aviation, an excellent avionics and general maintenance shop. Not wanting to overstay my welcome, I embarked on a plan to cut off the bottom four feet or so of the nose section. After a month of pulling wire, removing insulation, wrestling with ducts and removing pitot/static lines, the section was finally separated and I rented the telescopic forklift again.
We were concerned about picking up the entire 2000 pound section with one strap through the eyebrow windows, but this turned out to be no problem with a strap rated for 6000 pounds. We had no way of knowing where the center of gravity was prior to picking it up, but luckily it would up being slightly aft of the middle of the section, which facilitated putting it down on stack of 6×6 beams we had put in place to keep the cockpit level on the trailer I scored off of craigslist.
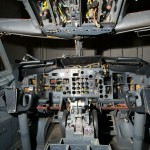
After securing it with tiedown straps, we climbed up on the tires holding up the aft edge, walked past the galley and the lav, and onto the flight deck for the first time. I had crawled underneath and stood up a few times in the previous weeks when we were in the process of cutting, but with the cockpit a full 90 degrees nose up, I wasn’t really able to get much past the jumpseats to touch anything. Now that I was able to really get a good look at the main instrument panel, flight controls and throttle quadrant, it became clear that this particular cockpit is in really good shape, even in spite of having sat out in the weather for few months after it was put up for sale. Whatever buyers remorse I might have had went flying right out the window.
Next steps: build a metal dolly to reduce the height, and cut off another foot from the aft end to reduce the width, all on the way to the next borrowed work space.
Click on any of the images below to see a larger image with descriptions.
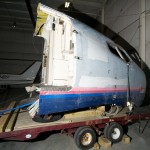
Back in April I bought an actual aircraft cockpit from a boneyard located in Walnut Ridge, Arkansas. It took that long to coordinate the transport of the this 3000 pound behemoth, the front 12 feet (minus the radome) of a Boeing 737-322 that came off the assembly line in August 1988, just after I graduated from college. This thing has probably seen quite a bit more of the country than I have, most recently on the back of a flatbed trailer.
I bet it never had this attitude back when it was working for United!
My new baby arrived last Wednesday evening. With a rented telescopic forklift in hand, two buddies and I used web straps to lift it up in the air to set it on its back. It was fairly dramatic watching it rain water (it’s been outside for several months at the boneyard), fasteners, and various items including an Starbucks cup. There was plenty of structure inside to pick this up with the forklift. We just needed two web straps, one through the eyebrow windows and the other through the nose gear well, to get it safely into the air.
No glass cockpit out of the box. This one is going to need some modification. Oh, and some cleaning, too.
I already have a pretty sweet setup based on gear from Northern Flight Sim, but I really wanted a full back wall, including the structures holding the circuit breaker panels and cockpit door. This cockpit seemed like a good deal when it came along, but when I later started actually talking to people who had done this before it was apparent that it probably could have been done for even cheaper.
The seller offered to include ‘cutting’ in the price, and I returned the pictures he sent with very specific lines drawn as to where I wanted my cuts. Compared to others who buy this sort of thing for home use, I wanted relatively few cuts, because I wanted to make sure that all the flight control stuff underneath the floor was properly preserved. I also had delusions that I recover some of the cost by taking the leftover aluminum to the scrap dealer.
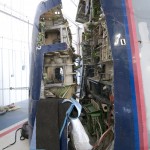
After the first six hours of cutting. It may not look like we made much progress, but its an important first step towards shaving about four feet off the bottom. We managed to remove a large piece from the very front which allows better access to all the ribs moving aft.
Had the seller actually performed the cuts I wanted, this thing might have actually fit under the door of my hangar. Unfortunately the cockpit arrived in its original condition, with no cuts at all. Some scrambling that evening led to its storage in a secure, undisclosed location, where I am now in the process of cutting about 4 feet off the bottom. All I have to say is, Boeing sure makes a sturdy airplane!
Welcome to my website. About 4 years ago I became obsessed with building a full size, fixed based Boeing 737NG simulator. I started by buying parts, both used pieces from actual aircraft as well as new pieces from vendors that manufacture parts for the simulator market. I am proud to be a crazy simulator builder and I started this site to share my madness with the world.
I plan to update frequently with pictures and blogs about my progress on the sim. My progress so far has been hampered by my inability to sell a troubled asset: a luxury 2 bedroom condo in Arlington, Virginia. I bought the apartment in the Fall of 2007, just as the real estate bubble was starting to burst. I had my sim set up in the second bedroom of my condo, but then had to remove the fledging project after my girlfriend (later my fiancee and now my wife!) moved in during the summer of 2008 and we decided to put the condo on the market.
My sim, circa 2008, back when we were living together. Real Weber seats, MIP and pedestal by CockpitSonic, overhead mounted on the wall (for lack of a better place), and Optoma short throw projector mounted on the ceiling.
My real estate agent took one look at the sim and said, “you’re going to have to remove this if I’m going to have any chance of selling this place.” I knew he was underestimating the mass appeal of a full size transport category aircraft cockpit, but I decided to trust the professional and moved everything into storage, where it remained until February of 2010. My other hobby is flying real airplanes, and it was during that month that I lucked into a hangar at Manassas Regional Airport. This particular hangar is an end unit that has about 300 extra square feet of space off the right wing, so the sim came out of storage and work started up again.
Starting to set up the sim in my new hangar. Shell framework, dual linked flight controls and floor by Northern FlightSim. Fiberglass shell is visible up against the wall in the background.