
One of the last major avionics projects prior to closing up the cockpit with trim was the installation of the avionics pedestal. This piece is screwed to the floor and has Dzus rails for mounting various avionics including the radio control heads.

The pedestal itself is a Boeing OEM unit that was installed in the cockpit I originally bought in 2011. Removing the pedestal required a great deal of patience as the screws holding it in place were exposed to the elements for a couple of years while the cockpit was waiting in the boneyard for me to rescue it. PB penetrating catalyst was essential to this task. I stripped the pedestal and refinished it with a self-levelling compound made by 3M. I then painted the unit in the style of an NG model 737, with off white for the body and gray trim around the top. Clear matte spray finish makes for a better appearance and covers up the sandpaper texture of the primer.

The power and USB cables were previously run under the floor back when it was still in vertical position. I chose a combo 12v/5v power supply to provide 12v to the FDS-SYS3 card and 5v for the lighting. This power supply also wound up being used for two USB hubs that wound up inside the pedestal. The backlighting is on a FDS-IBL-DIST-DIM with a FDS-IBL-DIST-EXP card. A 24v power supply was added later when I finished interfacing an OEM fire panel.

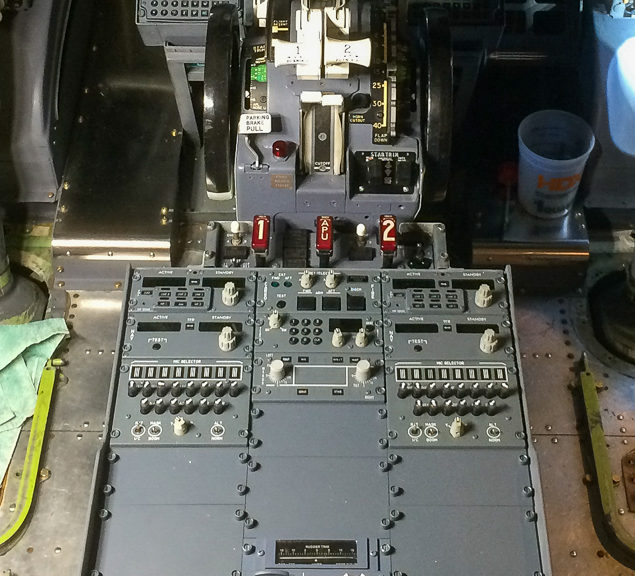
After screwing the pedestal back onto the OEM nutplates, I connected the various pedestal modules one at a time. My pedestal has 2x multicom units, 2x NAV radio heads, 2x dummy audio panels, one transponder control, a cargo fire panel, a dummy radar control panel, aileron/rudder trim panel, a door access panel, and a lighting control panel.
